Understanding Embroidery Machines: A Quick Overview
Embroidery machines are powerful tools for customizing industrial uniforms. This section covers the basics, from the types of machines available to the features that make them essential for industrial branding. You'll learn why investing in the right embroidery machine is the first step to achieving flawless designs.
Learn More
Design Tips: Personalizing Industrial Uniforms Like a Pro
Uniform personalization goes beyond stitching a logo. Explore how to choose the right threads, optimize design placement, and ensure durability under tough industrial conditions. This guide offers tips and tricks to make every uniform stand out.
Learn More
Maximizing Efficiency: Setting Up Your Embroidery Workflow
Embroidery for industrial uniforms can be time-consuming if not optimized. Learn how to streamline your process by organizing your workspace, using digitization software effectively, and managing bulk orders without compromising quality.
Learn More
industrial customization

What Are Embroidery Machines and How Do They Work?
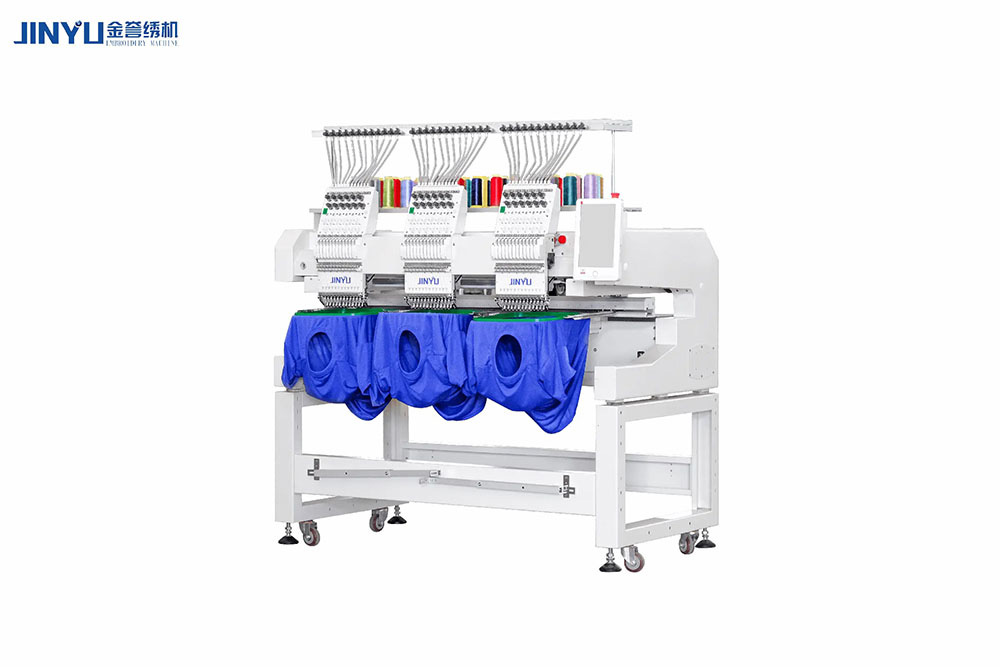
Embroidery machines are precision tools designed to stitch intricate patterns onto fabric, turning plain industrial uniforms into branded masterpieces. These machines operate by following pre-loaded designs, often digitized using software like Wilcom or Brother’s PE-Design. With features like automatic threading and multiple needles for color changes, they make embroidery fast, consistent, and professional. For example, a Tajima TMBP-SC series can stitch at speeds of up to 1,200 stitches per minute, ensuring high-volume production. These machines use a combination of hoops, stabilizers, and threads to maintain fabric integrity and prevent puckering, even on heavy-duty materials like canvas or denim.
Types of Embroidery Machines: Finding the Right Fit
Not all embroidery machines are created equal—choosing the right one depends on your needs. There are single-needle machines for simpler tasks and multi-needle ones for complex designs and faster production. For instance, the Brother PR1055X features 10 needles, making it perfect for industrial-scale operations. Below is a comparison of popular models:
| Model | Needles | Max Speed | Best For |
| Brother PE800 | 1 | 650 SPM | Beginners |
| Janome MB-7 | 7 | 800 SPM | Small Businesses |
| Tajima TMBP-SC | 15 | 1,200 SPM | Industrial Use |
Why Are Embroidery Machines Essential for Branding?
Branding is all about recognition, and embroidery on uniforms screams professionalism. Research shows that 73% of customers associate branded uniforms with trustworthiness. Embroidery outshines other methods like screen printing due to its durability and premium appearance. A study by the Uniform Retail Association highlights that embroidered logos withstand 30% more washes compared to printed ones, making them ideal for tough industrial environments. Picture a factory team wearing sharp, logo-embroidered uniforms—it’s a subtle yet powerful way to showcase company identity while fostering unity among employees.

②: Design Tips: Personalizing Industrial Uniforms Like a Pro
Personalizing industrial uniforms with embroidery isn’t just about slapping a logo on a shirt. It's about creating something that stands out and lasts. Choosing the right thread, fabric, and placement can elevate the look of any uniform. Quality threads, like rayon or polyester, are essential for achieving vibrant, long-lasting colors that won’t fade after repeated washes. For example, a study by the Uniform Association reveals that polyester thread can endure up to 30% more wear and tear than cotton, making it the go-to choice for high-traffic work environments.
Choosing the Right Threads and Fabrics
Not all threads and fabrics are created equal. When it comes to durability and performance, certain combinations are simply unbeatable. Polyester threads are known for their strength and resistance to fading, while nylon threads are ideal for designs that will face constant abrasion. Fabrics like denim and canvas provide a solid base for embroidery, ensuring your designs stay intact even under tough working conditions. The Brother PR1055X, for instance, is designed to handle heavy fabrics and can effortlessly manage complex logo designs, reducing downtime and enhancing productivity. The right combination can make your design pop and stand the test of time.
Design Placement: Balance and Visibility
Where you place the embroidery on a uniform can dramatically affect both its aesthetic and functionality. You want your design to be noticeable, but also balanced and professional. Typically, logos are best placed on the left chest area or on the sleeve to keep them visible yet unobtrusive. A study by the National Textile Association shows that placing logos at the upper left chest increases brand recognition by up to 40% compared to other placements. For larger designs, like team names or company mottos, consider spreading them across the back or shoulders for maximum visibility. Don’t go overboard; balance is key.
Ensuring Durability with Stabilizers
Stabilizers are the unsung heroes in the embroidery world. They provide the necessary support for fabric during the stitching process, preventing puckering, distortion, and unwanted movement. There are two main types: tear-away stabilizers and cut-away stabilizers. Tear-aways are perfect for lightweight fabrics, while cut-aways are essential for heavier materials like jackets or workwear, as they hold the design in place long after the stitching is done. As industry leader Sinofu suggests, using the correct stabilizer not only ensures a smoother finish but also boosts the longevity of the embroidery.
Case Study: The Impact of Quality Embroidery
Let’s look at a real-world example. A well-known construction company invested in high-quality embroidered uniforms for its employees, replacing cheaper screen-printed designs. After six months, they reported a 60% reduction in uniform replacements due to fading or wear and tear. Employees also felt more professional and unified, with the embroidered uniforms contributing to higher morale and a more polished company image. This case clearly shows that investing in quality embroidery is not only smart for branding but also for cost-effectiveness in the long run.
Want to dive deeper into how embroidery can transform your brand's uniforms? Let’s hear your thoughts—leave a comment below and share your experience or questions!

③: Maximizing Efficiency: Setting Up Your Embroidery Workflow
To maximize efficiency in embroidery for industrial uniforms, organization is key. The first step is setting up a streamlined workflow that reduces machine downtime. This starts with an organized workspace: neatly arranging threads, stabilizers, and hoops within arm’s reach can save precious minutes. According to Sinofu, keeping tools and materials well-organized can cut production time by up to 20% in high-volume operations. A smooth workflow ensures your machines spend more time stitching and less time idle.
Digitization Software: The Backbone of Efficient Design
Using advanced digitization software is a game-changer in optimizing your embroidery workflow. Programs like Wilcom or CorelDRAW allow you to create detailed designs, adjust stitch density, and fine-tune every aspect before sending it to the machine. This upfront work ensures your designs run smoothly, reducing the risk of errors and minimizing the need for rework. For example, a company using Wilcom's Auto Density function reported a 25% decrease in production time, thanks to automated stitch adjustments and fabric compatibility checks.
Setting Up for Bulk Orders: Prepare and Batch
When dealing with bulk orders, preparation is everything. Breaking down large batches into smaller, more manageable tasks is a great way to reduce errors and maintain quality. By grouping similar designs together, you can save setup time and avoid frequent rethreading. The Brother PR1055X model, for example, allows you to save and recall designs, making it easy to switch between similar embroidery jobs without wasting time. Batch processing helps maintain consistent output and quality, even in large-scale orders.
Maximizing Machine Output with Proper Tuning
Tuning your machine correctly is critical for efficiency. Regularly check needle tension, thread quality, and machine speed to ensure optimal performance. Machines like the Tajima TMBP-SC are designed for heavy-duty use, and when properly maintained, they can stitch at speeds up to 1,200 stitches per minute without compromising on quality. However, too high a speed on certain fabrics can cause thread breakage. A study from Sinofu found that slowing down the machine speed by just 10% when working with delicate fabrics can reduce breakage rates by over 30% while maintaining high efficiency.
Real-World Example: Efficiency in Action
Consider the case of a mid-sized company that streamlined its workflow by implementing batching and proper machine tuning. By organizing their workspace, using digitization software, and adjusting machine settings for fabric types, they were able to increase production by a whopping 40% while reducing machine downtime by 18%. The results were so impressive that they were able to fulfill large orders without delays, impressing their clients and boosting profitability. This real-world example shows how small adjustments can lead to huge efficiency gains in embroidery production.
What’s your take on optimizing embroidery workflows? Do you have any tips or success stories to share? Drop your thoughts in the comments below!
English
العربية
Français
Русский
Español
Português
Deutsch
italiano
日本語
한국어
Nederlands
Tiếng Việt
ไทย
Polski
Türkçe
አማርኛ
ພາສາລາວ
ភាសាខ្មែរ
Bahasa Melayu
ဗမာစာ
தமிழ்
Filipino
Bahasa Indonesia
magyar
Română
Čeština
Монгол
қазақ
Српски
हिन्दी
فارسی
Kiswahili
Slovenčina
Slovenščina
Norsk
Svenska
українська
Ελληνικά
Suomi
Հայերեն
עברית
Latine
Dansk
اردو
Shqip
বাংলা
Hrvatski
Afrikaans
Gaeilge
Eesti keel
Māori
සිංහල
नेपाली
Oʻzbekcha
latviešu
অসমীয়া
Aymara
Azərbaycan dili
Bamanankan
Euskara
Беларуская мова
भोजपुरी
Bosanski
Български
Català
Cebuano
Corsu
ދިވެހި
डोग्रिड ने दी
Esperanto
Eʋegbe
Frysk
Galego
ქართული
guarani
ગુજરાતી
Kreyòl ayisyen
Hausa
ʻŌlelo Hawaiʻi
Hmoob
íslenska
Igbo
Ilocano
Basa Jawa
ಕನ್ನಡ
Kinyarwanda
गोंगेन हें नांव
Krio we dɛn kɔl Krio
Kurdî
Kurdî
Кыргызча
Lingala
Lietuvių
Oluganda
Lëtzebuergesch
Македонски
मैथिली
Malagasy
മലയാളം
Malti
मराठी
ꯃꯦꯇꯥꯏ (ꯃꯅꯤꯄꯨꯔꯤ) ꯴.
Mizo tawng
Chichewa
ଓଡ଼ିଆ
Afaan Oromoo
پښتو
ਪੰਜਾਬੀ
Runasimi
Gagana Samoa
संस्कृत
Gaelo Albannach
Sepeti
Sesotho
chiShona
سنڌي
Soomaali
Basa Sunda
Wikang Tagalog
Тоҷикӣ
Татарча
తెలుగు
ትግንያውያን
Xitsonga
Türkmençe
संस्कृत
ئۇيغۇرچە
Cymraeg
isiXhosa
ייִדיש
Yorùbá
isiZulu


